Kat Von DLock-It Concealer Crème Review

Oh boy! This is by far one of the best cosmetics I've had the pleasure of reviewing!
Grab a cup of coffee, glass of wine or bottled water while you read about a product that you NEED to go get!

A month or so ago, the awesome folks at Influenster sent me the Kat Von D Lock it Revloution Vox Box to review. 
In in were two shades of the concealer, setting powder and two application brushes. 
I was eager to try these products out as soon as they came. However, I knew that we had vacation coming up. We were going to Vegas. I thought that 100+ desert heat would be the ideal way to truly put this product to the test.
It was my birthday. That night my hubby had planned a fancy dinner for us. During that day, I wanted to go shopping and get a blowout at Drybar. So, after a perfect breakfast in bed, I got up and dressed around 10:00 am (don't judge it was my birthday and I was on vacation! he he).
I decided since I was in Vegas it was totally cool to rock some blatantly , obviously fake lashes . Once those were on , I put on my primer and applied the Lock it concealer in warm 13. I applied it in 2 inverted triangles. I find that's gives ideal coverage.


The formula goes on smooth and thick, not at all runny. It covered my dark under eye circles (the night prior was a Champaign filled  late night) in one coat.
I let it dry a tad while I was applying my eyeshadow. Once I had done that, I applied my foundation and blended it all together.

The coverage was not at all disturbed or lessened by the application of the foundation.
It was a double vanity sink...I still had cosmetics and hair product EVERYWHERE! :)
Once my foundation was on, I applied the setting powder. First, i used the smaller brush to apply it under my eyes, then the larger brush to apply it all over threats of my face.
After that, it was brows, blush, eyeliner and mascara. I noticed the finished product had an almost airbrushed appearance.
However, we all know that there are ton of products that look great when first applied, yet they just don't hold up.
From here I went out and about. I did a lot of running around in 104 degree heat. I then went to Drybar for my blow out. 
After about 3.5 hours of errands, it was time to go back to our room and get ready for our fun night out. To my delight, NOTHING needed to be reapplied.
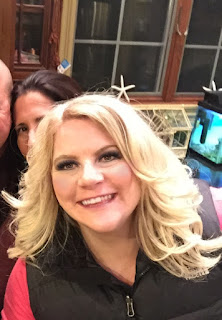
Here I am at dinner. This is 11 hours after it was applied.
This is hands down the best concealer that I have ever used.
I see there is now a foundation from this same line.
I cannot wait to get that as well.

If you are interested in trying anything from this line out, Its available at Sephora.
You will not be disappointed. 

Keep on shimmering lovelies.

XO
Sheila


Pizza. Who does not love pizza? It is the perfect food. Life is too short to eat bad pizza. If you are going to indulge, make sure it is worth it.
I had tried making pizza at home before. It never ever came out like pizza that you'd buy.
I'd end up with soggy, doughy crust, which wasn't crispy at all.
Enter in to the picture my aunt Gini. Gini is the most cultured, elegant person that I have ever known. Gini is also the best damn cook, I've ever encountered. I'm not talking about someone who can make a good casserole. I'm talking about a woman who trained for years in Europe and who's cooking can rival any chef, celebrity or other. 

When Chad and I were married a year ago this month, as a wedding gift Gini put together a special cookbook that she made just for us. Her pizza recipe was in there. It made me want to try my hand at making pizza again. I lamented to my aunt about how my attempts at pizza always fell short.
Turns out, my technique was 100% incorrect.
In the past, I'd assemble the pizza then place it in a 450 degree oven until the cheese was melted .
Nope. That is NOT how you do it.
Below is a fool proof step by step that will get you a finished product that will beat out your neighborhood pizza place.

A few thoughts before we start...the crust and the sauce. This sauce could not be more simple. Take one 28 oz can of the highest quality San Marzano tomatoes and put them through the blender with 1/4-1/2 a teaspoon of sea salt. This is all you need. However, if you are using regular, old , plain tomatoes from the 59 cent rack...you will NOT get the same results.
As for the crust, its made at home two nights before making the pizza.  My aunt told me that sometimes she'll "cheat" and buy her dough at a local pizza restaurant. She did caution me to NOT buy supermarket pizza dough, as that is typically sitting around for who knows how long.

Now, on to making the pizza!
The first thing that you'll need to do , is position one of your oven's racks in the top 1/3 of the oven. Put your pizza stone in and set your oven to 550. (Some oven's only go to 500, that's okay too.)
Once you have your oven at 550 degrees, leave it for one hour (this step scared me at first) The idea is to get that pizza stone screaming hot.
While this is going on..its time to get to work on your pizza.
I cannot recommend strongly enough, getting a pizza peal. I tried numerous ways to avoid buying a pizza peal. Don't be a fool like I was. You can get a decent one for under $25.00. It makes all the difference. 
Take your pizza peal and cover it with corn meal. This is key. Once your oven and pizza are ready, you will need the pizza to slide right of the peal and into your oven. The corn meal will make that happen.


Start working with your dough. You'll want your dough to be in a ball when your first begin. Working from the center out, start to knead the dough. As you get going, let the weigh of the dough work for you in regards to stretching it to the desired shape and thickness. (This recipe works best with a thin dough.)

Once you have the dough shaped to your liking, the fun begins...assembling the pizza! I'm a pizza purest, I like a nice cheesy margarita pizza. However, feel free to get creative with the toppings.
Start always with the sauce. Here is where many home cooks go wrong. They will put on FAR too much sauce. It doesn't look like a lot at the time, but they sadly find the pizza is drowning as soon as they bite into it. Depending on the size of your pizza, you will want no more than 5 or 6 tablespoons of sauce.

This is the right amount of sauce.


If you'd even consider topping this with mozzarella that is shredded up in a bag, raise your hand. Okay, now use that hand to slap yourself. (Kidding! Nothing but self love here!!) 
For this, we are using fresh, wet mozzarella from the deli. Roughly 6 ounces,which we will drain and peel into 1 inch pieces.
Along with the mozzarella , we'll also add fresh basil leaves.


Once you have put the mozzarella and basil on, you'll want to grade fresh some Parmigiano-Reggiano directly onto the pizza. 


At this point, my dear friend, Lisa said me "Can we just eat this now?" The scent of freshly picked basil is very hard to resist!
Now, here is a step that I had never known about , yet it is crucial . Once you have all of your toppings on take one tablespoon of best quality olive oil and drizzle it over the entire pie. This step is what will get you an artisan pizza in your own oven.

Once that oven has been at 550 for a full hour, open the oven door and slide this gem right on to your pizza stone with one, quick motion.
You'll leave this in with the oven on for only 3-4 minutes.
After the 3-4 minutes, turn the oven off and turn your broiler on high. This step should last another 3-4 minutes. You'll know when its done when the cheese is golden and bubbling.
Remove from your oven and immediately transfer off of your pizza stone. Ideally, you'll have a vented pizza pan to transfer onto.

The vented pizza pan is ideal, because the bottom of the pizza will be steamy when it first comes out of the oven. You do not want to let that steam make your crust soggy.
If you do not have a vented pan, transfer it off of the pizza stone to a regular pan. Using a spatula , lift the pizza an inch or two off the pan. Do this twice on alternating sides of the pizza.

Let it sit for about 5 minutes, then serve! Its SO SO SO Good. If you are anything like me, you'll have a hard time believing that you made this at home.
My beverage recommendation for this, is to keep it in Italy with a nice, chilled Santa Margarita Pinot Gregio! 


Okay, here is a quick shopping list for you.

* 8 -10 oz homemade pizza dough
*6 Tablespoons of homemade pizza sauce (see above)
* 6 ounces for fresh Mozzarella
*On the block Parmigiano-Reggiano cheese (I've always just eyeballed this step. Maybe 2 ounces?)
*1 Tablespoon top quality olive oil
*Corn meal for your pizza peal
* 5 or 6 fresh basil leaves.

Thats it! You are those few, simple ingredients away from this!
ENJOY!


A hair affair

March 21, 2016 in
Hello!
Sorry for the break between posts. I tend to feel that I should only write a post, if I have something worthy of sharing. I'm not looking to waste anyone's time!
So, Thursday was hair day, hair day is the BEST day.

It was my amazing stylist who told me to write this post. When she tells me to do something , I listen!
Anyhow, I (now) have very, very healthy hair. I have no breakage, no split ends, no fried strands.(This has been a very hard won battle!)
I get a double process color done. Its a heavy duty, serious chemical procedure, far more intense than having a few foils.

Anyhow, even though I do this "chemical blizzard" on my head my hair is still in great shape.She combs my hair out after washing it,and none is left in the comb. My stylists told me how I got to this point is something I should share. Especially, because not so long ago, I was on the very opposite side of the hair health spectrum.  Not too long ago, I had to go from almost bra strap length hair to a bob that was ear lobe length. It was breaking off in chunks, It was so dry and brittle that if I went to put it in a pony tail, I'd have massive amounts of breakage. The next post I will write will be about everything that I had done to get it to that horrid point. That post will be a tale of caution as to what NOT to do.

Since today is Monday, lets focus on the positive. Mondays do not need any added negativity!
Disclaimer, I'm NOT a stylist. I have no background whatsoever in the science of cosmetology . If you have a trusted stylist that tells you anything that contradicts what I'm about to, go with them! This is just a description of what personally worked for me to get my hair healthy.

Okay, first things first. Here is my hair now. Please pardon my under eye circles..


Alrighty....here is my step by step to get on the road to hair health!

1) Wash your hair as infrequently as possible. 
Depending on your hair type , that might mean 2 times per week, it might mean 4.
I can hear you now.. "I have to shower every day!" Yes, I know... all civilized people do. ;) This is why you want to get yourself a good quality shower cap. Not the thin plastic type you find at hotels . You'll need a nice, thick terry cloth lined one. Here is mine, I got it from Dry Bar. I highly recommend it!


2) At least 1 time per week , do a really intense deep condition treatment.
After you shampoo, cover your hair in a top quality deep conditioner. (If you have thin/oily hair, leave your roots bare.) Dampen a hair towel and put in the microwave for a minute or two , until its hot and steamy. Then, wrap your hair with the conditioner in the towel. Leave it on for 10- 30 minutes. Aside from it really giving your hair a boast, it feels SO GOOD!
My favorite deep conditioner is by Fakkai. It smells heavenly on top of working magic.


3) This one is the one that I get the most crow for...no using drug store shampoo or conditioner.
I know that a lot of folks just don't want to spend the $$ for premium brands. There REALLY is a difference in quality of ingredients though. If you want shinny, healthy hair , you are not going to find the tools of the trade at Wal-Mart..
I'm not saying you have to buy your products at the salon. No, normally you can get a far better deal at places like Ulta.

4) Limit the heat tools to once or twice per week...limit the flat iron to "once in a blue moon". Flat Irons , in my opinion do the most damage . You can always tell when you see someone who flat irons their hair too frequently. Its full of breakage, it lies flat like lifeless seaweed on a rock and it has no bounce or shine.
Plus, nowadays super flat ironed hair is down right passé  . It screams "I peaked in 2006!!" Its not a good look.
My new thing is doing big, full "Farrah style" waves. I didn't want to be using a curling iron every day. Therefor, I had my mom teach me to do a roller set. Its a throw back, for sure. Look at photos of women from the 1960's 0r 1970's. You NEVER SEE THEM WITH HAIR BREAKAGE!

5) For color....GO TO A PROFESSIONAL. End of Story.
 This is one that I had to learn the hard way. Learn from my mistake!
You can do irreversible  damage to your hair with chemicals ( This is how I ended up with an ear length bob..)
Worst case scenario , it will break off in chunks. (Been there!) Best case is you will have obviously unnatural looking color. If you buy a box of color at CVS, you'll end up with hair that is a block of color. Natural hair is not one block of color.
There is a person I know that thought she'd try mixing her own salon formula at home. She figured that she could get the salon color at home without spending the money. Get idea in theory right? You mix a color with a developer and you are in business, right?
Wrong. This woman's hair color is "blorange". Those of us that were little kids in the 1980's might remember the TV show "Alf". That is pretty much her hair color .
I do not say this to be mean. I say this because I don't want it happening to anyone else.
Professional colorists spend so much time in school. Then they are continually learning new techniques. Respect that and understand that you cannot replicate their knowledge and skill by watching a few youtube videos.
If you are thinking "I can't afford salon color" Shop around! Do not be afraid to call multiple salons. Tell the stylist that you have a limited budget, they will work with you!

6) Find the right styling products for your hair type. 
I personally have very thick hair. What I use on my hair is very different than my friend who has baby fine hair. 
Places like Sephora will let you sample any product that they have. This is a great way to find out what will work for you.
Here is my hair cocktail of choice
I mix equal parts CHI Silk Infusion (also is a great frizz fighter!) and Dry Bar's Hot Toddy.
This for me, is what does it. It did take some experimenting to find this.

Well, thats about it from me. If anyone has any tips of there own, I'd love to hear them!

Keep shimmering my beauties!
XOXO
SheShe


© At The Kaiser's Table · THEME BY WATDESIGNEXPRESS