Hello! Happy Friday! If I've said it once, I've said it a million times... "What's better the a summer Friday!?"

So, last night I got to thinking about the products that I use on a regular basis. My "product heroes" as I often refer to them. Admittedly, I have a penchant for liking higher end products when it comes to cosmetics/beauty. However, a few of the items that I rely most heavily on, are down right cheap.
I thought it might be interesting to list those out with the reasons as to why I love them. As always, I'll include links (at the bottom) and double as always... I make nothing off of you or your clicks. I'm not looking to profit off my friends!


Clinique's  Extra Mild Liquid Facial Soap   $17.50


When you see a youtuber or blogger going on an on about how you "JUST HAVE TO BUY THIS $80.00 FACIAL WASH THAT THEY USE!!" , run! Also, you can be sure they are just trying to get your $$. Regardless of what they tell you, no facial cleanser is going to fight wrinkles,  sun spots, fine lines, etc, etc. A facial cleanser is simply not on your skin long enough to do any such thing. Talk to any dermatologist, they will tell you to get a cleanser that is gentle and non irritating, and to invest the
bulk of your skin care money into serums and creams.  
Personally, I've been using this cleanser since I was 14. I stared with it in bar form and moved into the liquid form when I stared using a Clarisonic brush.

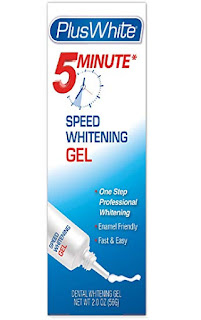
Plus White 5 Minute Whitening Gel  $5.99


Where do I even begin with this one??  First, this stuff works better than any "White strips". Like...WAY better.
This stuff , dare I say...has made my teeth more white than the professional whitening in the dentists office EVER has. 
White Strips will run you around $50.00. In office whitening procedures at the dentist are typically between $200-$500. This tube of $6.00 gel does are more effective job, hands down. You can put it onto a tooth brush and brush it right onto your teeth. I opted to buy inexpensive, customizable trays on Amazon.
When I first started using this, I'd do it 4X a week for 20 minutes at a time ( I drink coffee and red wine!).
Now, my teeth are about as I want them. Therefore, I'll use this once or twice a week for 5 minutes, just for maintaining my teeth's color.


Maybelline Fit Me Loose Powder  $6.00

Those of you who follow me on Instagram  (@sheshe830) recently saw me talk about this. This little ditty has blown me AWAY. I've compared this to my KatVonD, Tarte and Laura Mercier powders...I love them all, but I'd pick this one over any of them. This sets your make up perfectly, yet does not look like you have powder on. If you had covered the label, I'd of guessed that this was a Chanel product.

Target Eye Make Up Remover $2.50
If you wear any eye make up, go get this. The bottle says that it compares to Neutrogena Eye Makeup  remover.... As "Dwight" from "The Office" would say.... FALSE!
The Neutrogena eye makeup remover cannot hold a candle to this.  However, I find it to be a spot on dupe for Lancome's Bi-Facil eye make remover. That stiff costs $28.00 and is worth it. If you can find an eye make up remover that can cut through waterproof mascara, gel liner and still be gentle enough to NOT hurt your eyes, its worth it. When you can find one that does all of that for under $3.00, you know you've scored big time! 

L'Oreal Lash Paradise Mascara     $5.99


I've already talked about this baby in depth in my "Duping Divas"  ( you can read that here....Duping Divas )
Without repeating myself, I'll say this...If I could only own one mascara, it would be this. This out preforms all of the others that I've ever used. The only thing I'd recommend though , is to be sure to buy the WATERPROOF version. For whatever reason, I find the formula of the not waterproof version to be just meh, where the water proof one is a rock star!


Links:


Well that's it for now. If anyone out there knows of any other inexpensive beauty finds, PLEASE comment on this post with them! We could ALL help each other out!

Have a lovely weekend!!


XO
~S

Ligurian Pesto

July 17, 2018 in ,


Hi Everyone!
Let me say right out of the gate, no I'm not trying to make this a "cooking blog". I know that the majority of you who come here do so because you are a fellow makeup/fashion lover.

The reason for this post is that whenever I make pesto, I'll get asked how to do it. I figured, doing a post where I can just share the link is easier than writing it out repeatedly.

Pesto is amazing and its amazingly simple to make. You don't need your oven or your stove. You'll likely want to use a food processor or blender, yet even those things are not necessary.

Ligurian pesto originated in Liguria, Italy. It was prepared with a mortar and pastel...hence the name.
You might think that you do not like pesto. My husband used to think that. He'd only had store bought pesto. While you can buy a decent okay jarred marinara sauce, the same cannot be said for pesto. Trust me, I've tried. Thankfully, due to the ease of preparing it, you don't have any reason to buy it.

Let's start with your ingredients:

  • 2 Bunches of Fresh Basil
  • 1/3 C freshly Grated Parmigiano-Reggiano Cheese
  • 1/3 C Freshly Grated Pecorino Cheese
  • 1/4 C Pine Nuts
  • 1/2 C Extra Virgin Olive Oil
  • 3 Cloves of Garlic, coarsely chopped 

Directions:
In a food processor, pulse basil and garlic. Add in both cheeses, pulse more. Add in pine nuts and continue to pulse. Lastly, add in the olive oil.  Process until you have a thick, smooth green (heavenly) paste.

Toss it right onto hot pasta, or put into jars and refrigerate. You guys, this is SO good and it really is THAT simple!

If you are making this for someone else , or a party... check if your guest has any food allergies. If someone is allergic to pine nuts, walnuts can be used in their place.


Grown in our yard, by my awesome hubby.


When it looks like this, you have it exactly how you want it.


And this is how you make everyone's day, give them a jar of this perfection!!!


XO
~SheShe


Hello! Happy Thursday my friends!
Thank you to my beautiful , intelligent and all around lovely friend, Glenda for suggesting this post.

Cleaning your make up brushes is something that you hear everyone harp about. We've all heard how you are setting yourself up for horrid  infections, etc if you are using brushes that are not clean. I do think this is somewhat of a scare tactic. If it's just you who uses your brushes and you have not come in contact with any bacterial or viral infections, they probably wont make you sick.
However, this is NOT to say that you get a pass to not clean your brushes. Unclean brushes will give you a mucky, muddy application and likely acne... aint  nobody got time for that! :)

Cleaning your brushes and sponges does not, nor should not be an expensive or time consuming endeavor. First things first... DO NOT WASTE YOUR MONEY ON PRICEY  CLEANING SOLUTIONS that are marked as "brush cleaners"! I've seen this stuff being sold for over $50. That's a scam, plain and simple. Get yourself some original Blue Dawn dish soap. This is the what they use on animals that have been affected by oil spills. It's strong enough to get the oil off, but gentle enough that it won't harm an innocent animal.
The only thing I'd suggest purchasing, is this brush cleaning palette by Real Techniques. It is so easy to use, it fits in the back of your hand. The pivots and grooves truly help to get all of the product out of your brushes. It only costs between $12-15. Its worth every cent in my opinion.  Click here to purchase  ---> Real Techniques Brush Cleaning Palette  Just to reiterate... Nope, I do not make a cent off of you from these links!  #notanincomegengeratingblog .  Once you have everything ready to go, fill up your sink with warm water and a few squirts of Dawn. Add your brushes into the warm soapy water and let them soak for 5-10 minutes.
Don't be alarmed , the water will turn brown. Better that this is in your sink and not being rubbed onto your face.
For each brush, add an additional drop of soap or two to the cleaning palette. Then rub the brush all over the palette.

Once you have done this for each brush, be sure to rinse each one individually and thoroughly under running water.         
If it's a brush that is on the full side, wring it out after its rinsed. Once they are all cleaned and rinsed, just lay them flat to dry. This normally will take 10-12 hours. I like to do this in the afternoon so that they will be ready to go the next morning. If you need to speed this process up, you can use your hair dryer on the COOL setting.  I'd suggest waiting until the brushes are at least 2/3 dry before doing this though.
There is no doubt that "Beauty Blender" style sponges have become a staple for so many of us. Personally, I use mine to apply foundation, concealer and powder. Some folks use them for blush, contour and highlight as well. Hopefully, you rinse yours out very well after each use.  Even under the best conditions, they will become covered in product.
                                                                                                                             
The good news is, cleaning these babies could not be easier! Fill a large mug or container with clean, soapy (Blue Dawn!) water. Drop your sponge(s) in and be sure they are fully submerged.
Now, just put the mug with your sponges in the microwave for 1 minute.  Once this is done, pour the mug out into your sink and run the sponges under cold water. DO NOT TOUCH THEM until after you have done this. You'll get burned badly if you do.
Once you have rinsed them, they will look good as new!


Ta-Da!!!!

Well, I hope this helps! I hope that after seeing this, you'll see that giving your brushes a good cleaning is not daunting and is absolutely worth it .
Have a FANTASTIC weekend , lovelies!


XO
~SheShe


© SheShe and Shimmer · THEME BY WATDESIGNEXPRESS